Content Editor is a tool that will help you write and optimize your articles to get higher search engine rankings for your content topic.
With the help of Surfer’s algorithms and top-ranking pages (competitor analysis), you will be given guidelines on structuring your article by sharing a detailed list of relevant keywords to include in your content to rank well. Not only that, but you will also receive real-time feedback on overall on-page optimization with the help of Surfer’s Content Score.
Content Editor vs Surfer AI
Content Editor will provide guidelines and frames for writing your article manually. With Content Editor, you will maintain complete creative control over the writing process, but you will save plenty of time on research. It serves as a helpful tool rather than an automated content generator.
Surfer AI takes the guidelines provided and automates the article creation process. It generates content based on the suggestions and parameters set by the user. If you want Surfer to write for you, check out these articles.
Once you have picked the best keyword/s to target with your content, you can create a Content Editor query.
Enter keyword
Choose your target location
Select crawler type: mobile or desktop crawler
 IMPORTANT NOTE: Every completed query equals a credit usage in your pool, depending on your Surfer subscription. Once the query loads, click on it from the list, and you will see your draft, where you can either copy and paste your written content or work on it from there.
You can create and select multiple keywords in one Content Editor search query. You can add up to 20 keywords for one article, and separate each keyword by a comma (,) or shift + enter.
This is a quick workaround that lets you combine multiple clusters from your Keyword Research.
Writing your articles from scratch while making sure they're SEO-optimized can be daunting and, sometimes, may also result in writer's block. You can maximize the Auto-Optimize feature to boost your content and Content Score.
Once you've completed (or are close to) writing your article, you can use Auto-Optimize with a single click.
Let our algorithms analyze the best opportunities to enhance your content and help it rank higher. Relevant NLP terms will be added to help enrich your content while retaining your content's message.
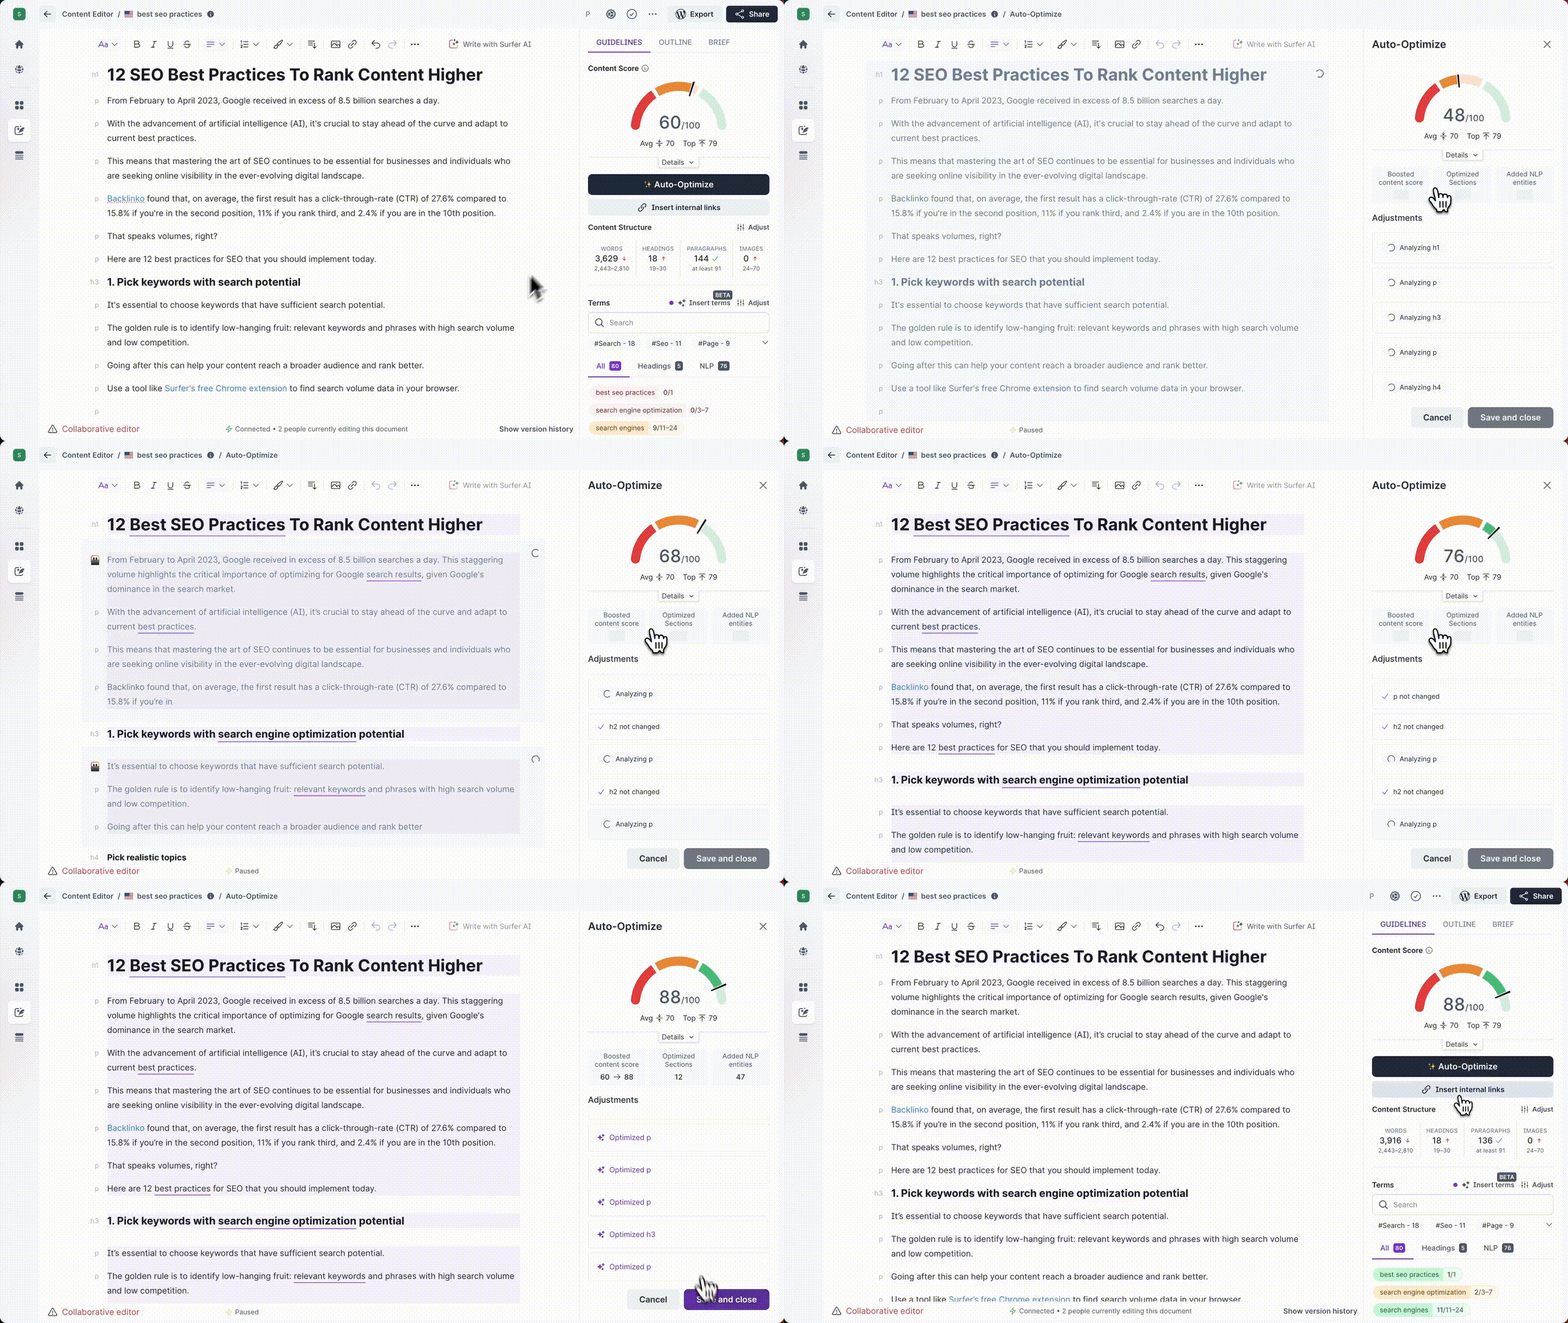
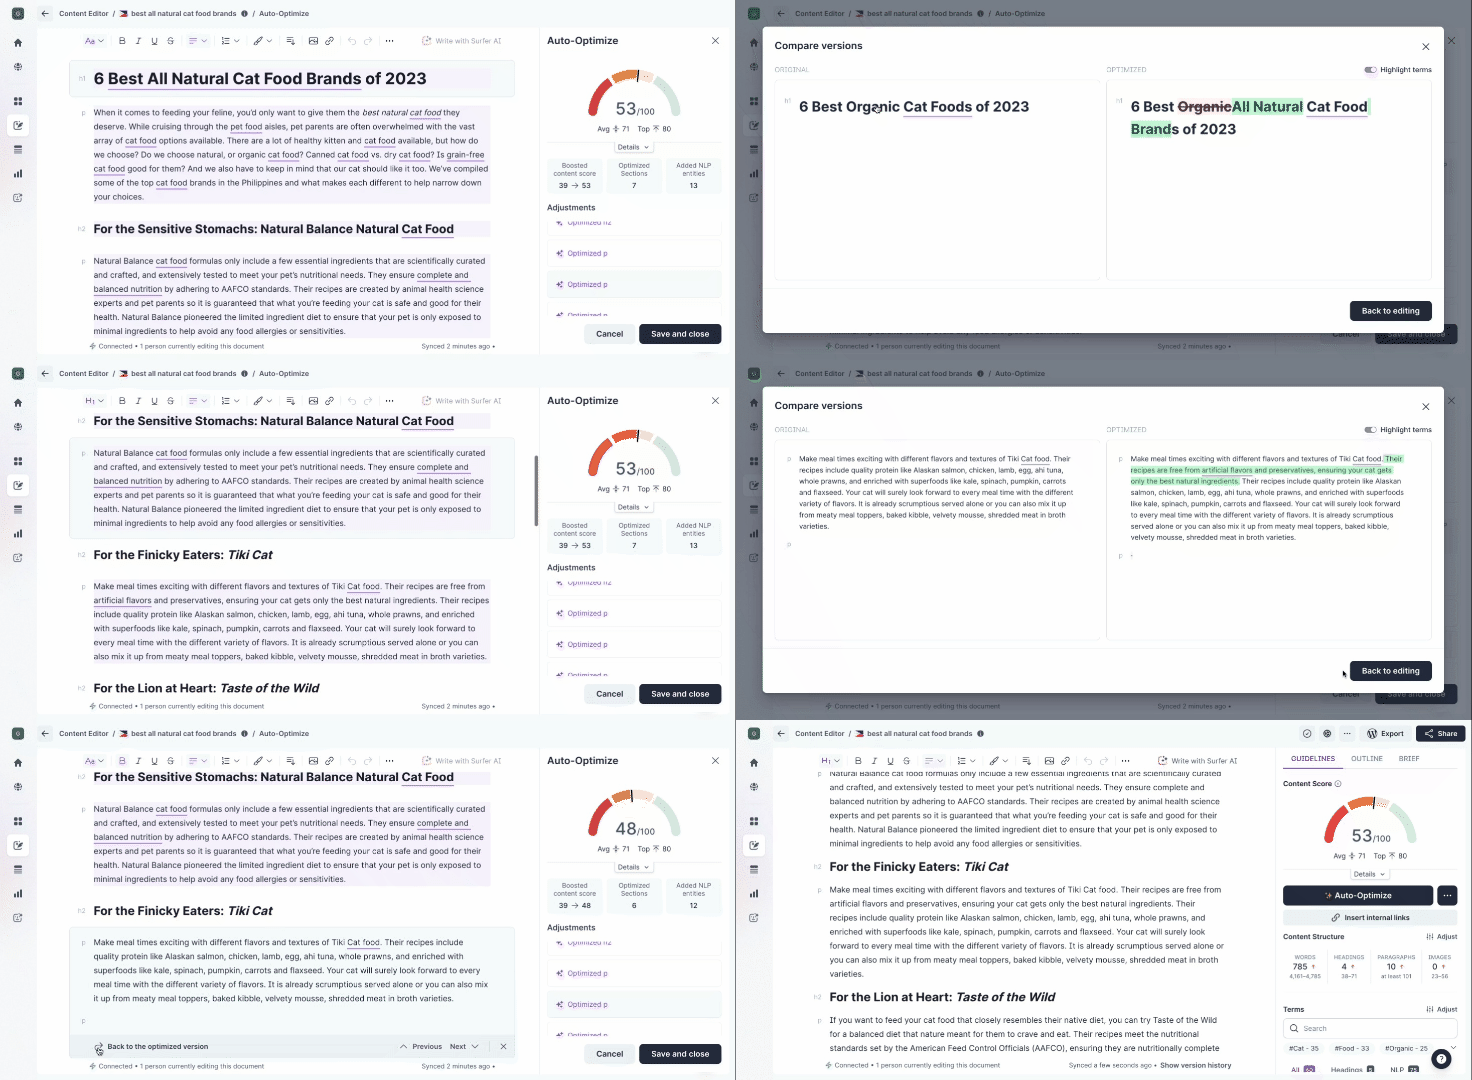
The results are shown in real-time, and you can approve or discard the optimization suggestions.
Click on a suggestion to see the exact section or heading that was auto-optimized. Feel free to compare the idea to the original version. You also have the option to restore the original. Hit save and close after review.
I want to learn more about how the Auto-Optimize feature works!
The more content pages your domain has, the harder it gets to do internal linking manually.
The Internal Linking feature is meant to help you streamline this process with just a few clicks. There is no need to scour through dozens, or maybe more, of URLs to link to your pages.
Just connect your Google Search Console and select the Insert Internal Links button from the editor. You can select the GSC account of the domain where your article will be published.
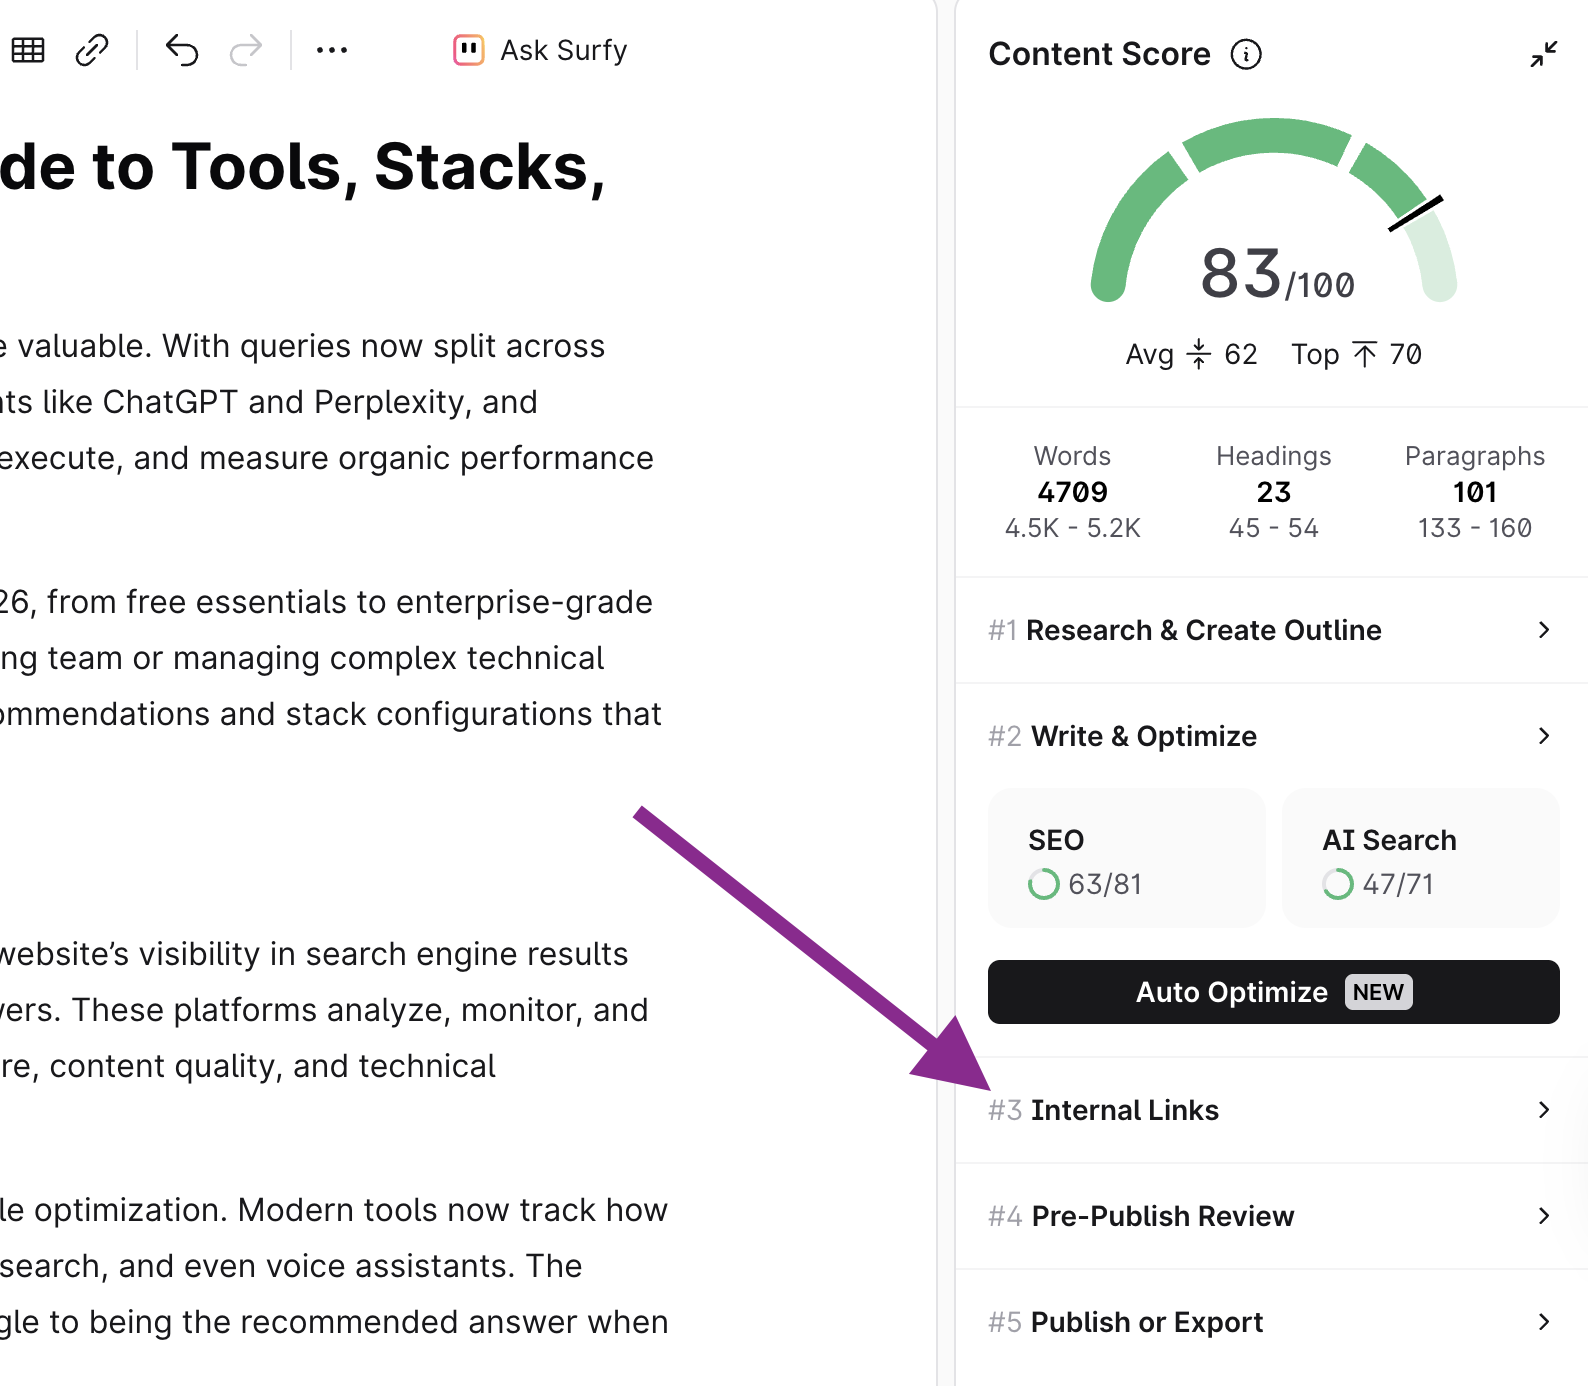
The feature will automatically search for and display a list of internal links that would fit your article.
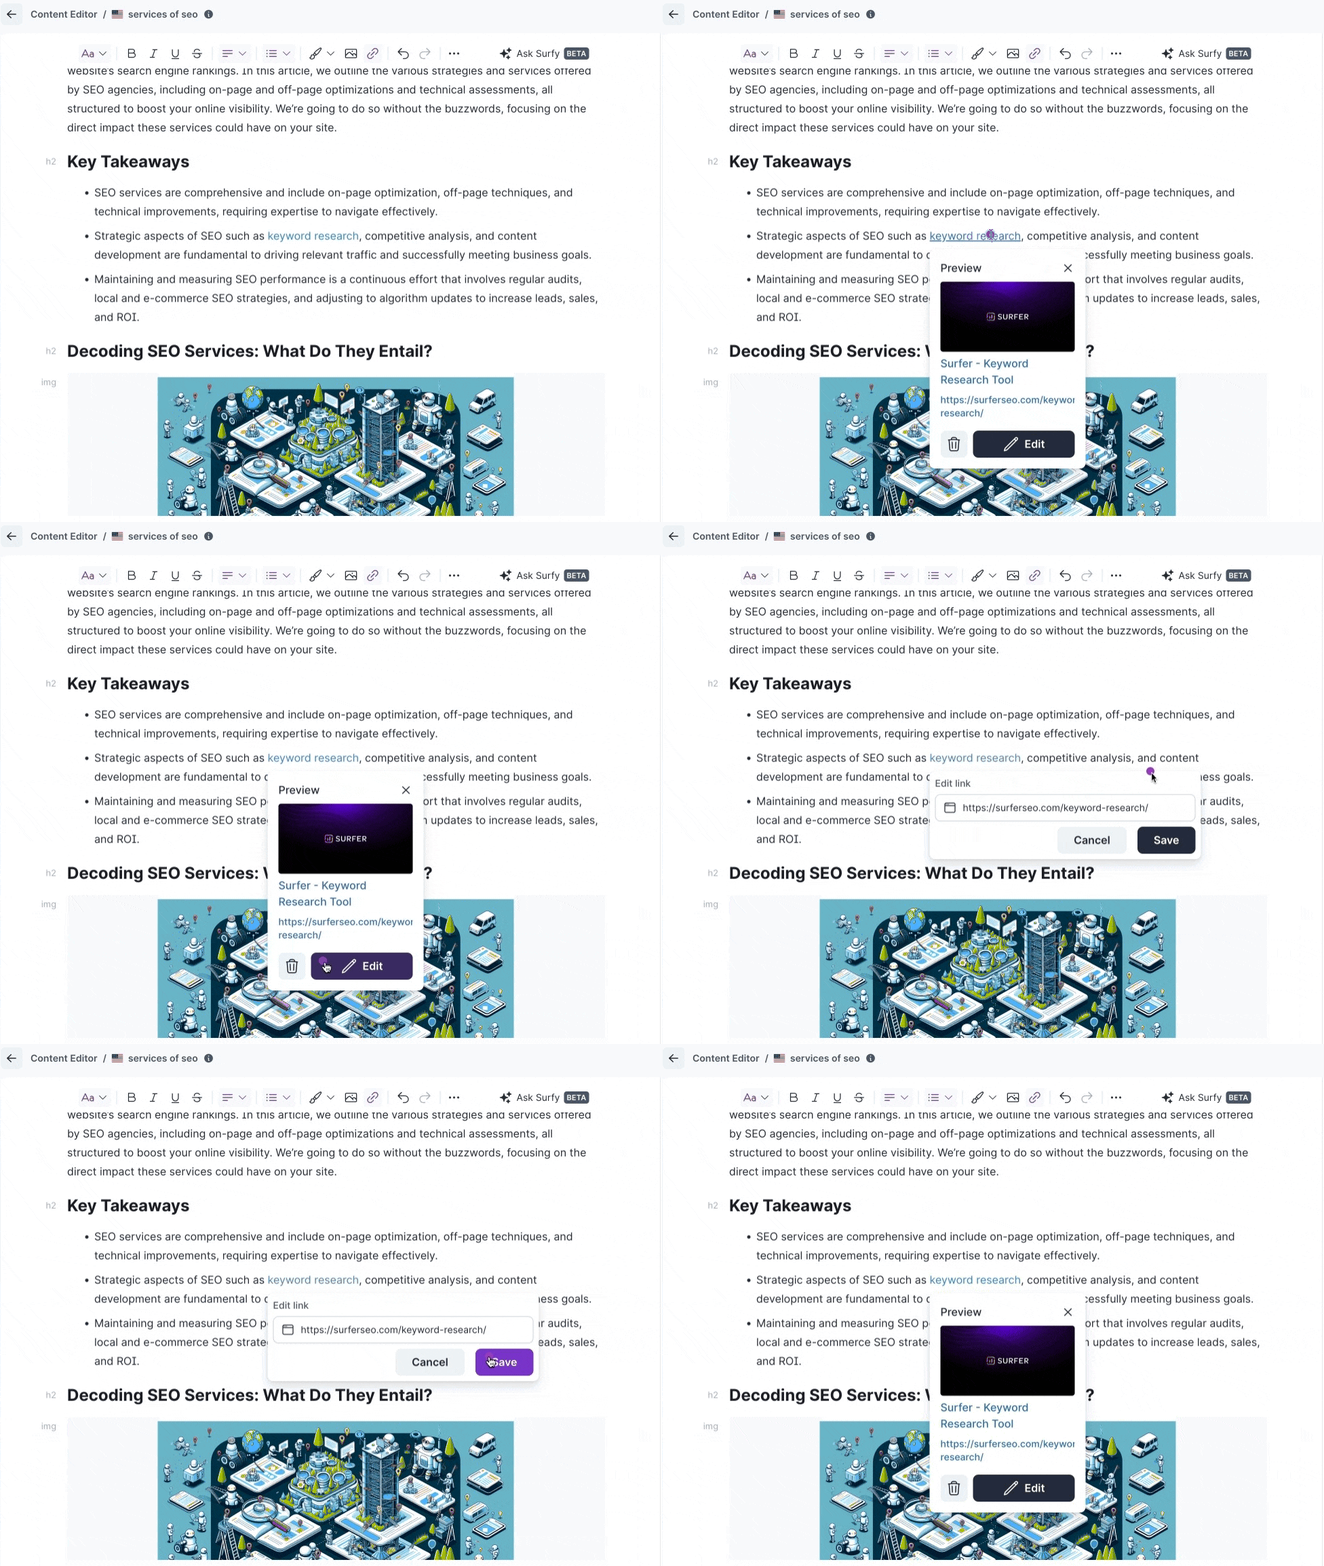
Once you’ve accepted the suggestions — and even added your own links to the list — you can move on to the next step: automatically detecting relevant anchor texts and inserting them into your article.
Before saving, you can still review, edit, or discard any suggestions to ensure everything fits perfectly.
Read more about the Automated Internal Linking feature »
Note: We've made recent changes in the interface within the editor, namely the Workflow Tab. You can still see the Guidelines quickly under the Guidelines Tab.
Under the Workflow Tab, you'll see five sections:
Get Started: Here, you'll find your Competitors, the Import URL button, and the Outline and Templates button. You can also use, Surfy, our AI Writing Assistant to get things going
Write and Optimize: You can keep on working on your draft by reviewing our suggested terms under SEO Entities and optimize for AI Search by adding Facts. You can also insert automated Internal Links on this step.
Review: Here, you'll find the MetaTitles and Descriptions and Plagiarism Checker.
Publish: This is where you'll find the buttons to Export to WordPress and Create a Social Media Post. You can also export the content you've been working on as an HTML or Markdown.
Change Status: You can mark you content as Done once you've finalized everything.
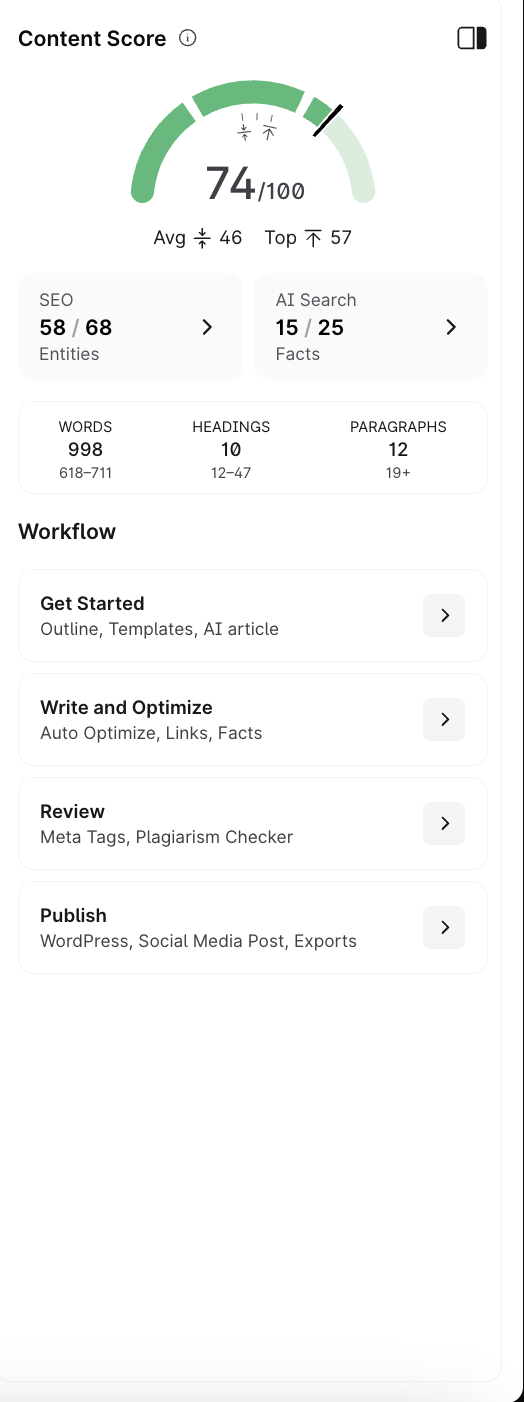
It's important to remember that if you will open your article from outside the Editor using a Shareable link, this Workflow Tab will not be visibile. Instead, you will still see the old interface.
The Customization Panel allows you to customize your content guidelines before you dive into writing. This step is optional as Surfer, by default, chooses the best setup, but you can make any necessary adjustments and work on your guidelines.
Organic competitors – Based on your choice, Surfer will recalculate the content structure and terms for your content.
Content structure – You can change the number of words, paragraphs, images, and headings.
Terms to use – All words and phrases you'll need in your content. You can add or remove phrases that you find irrelevant.
Topics & Questions – Here, you can define your content draft. Surfer suggests multiple ideas, but you can add yours as well.
Notes - This is the best place to do it if you want to share any notes or instructions with your writers.
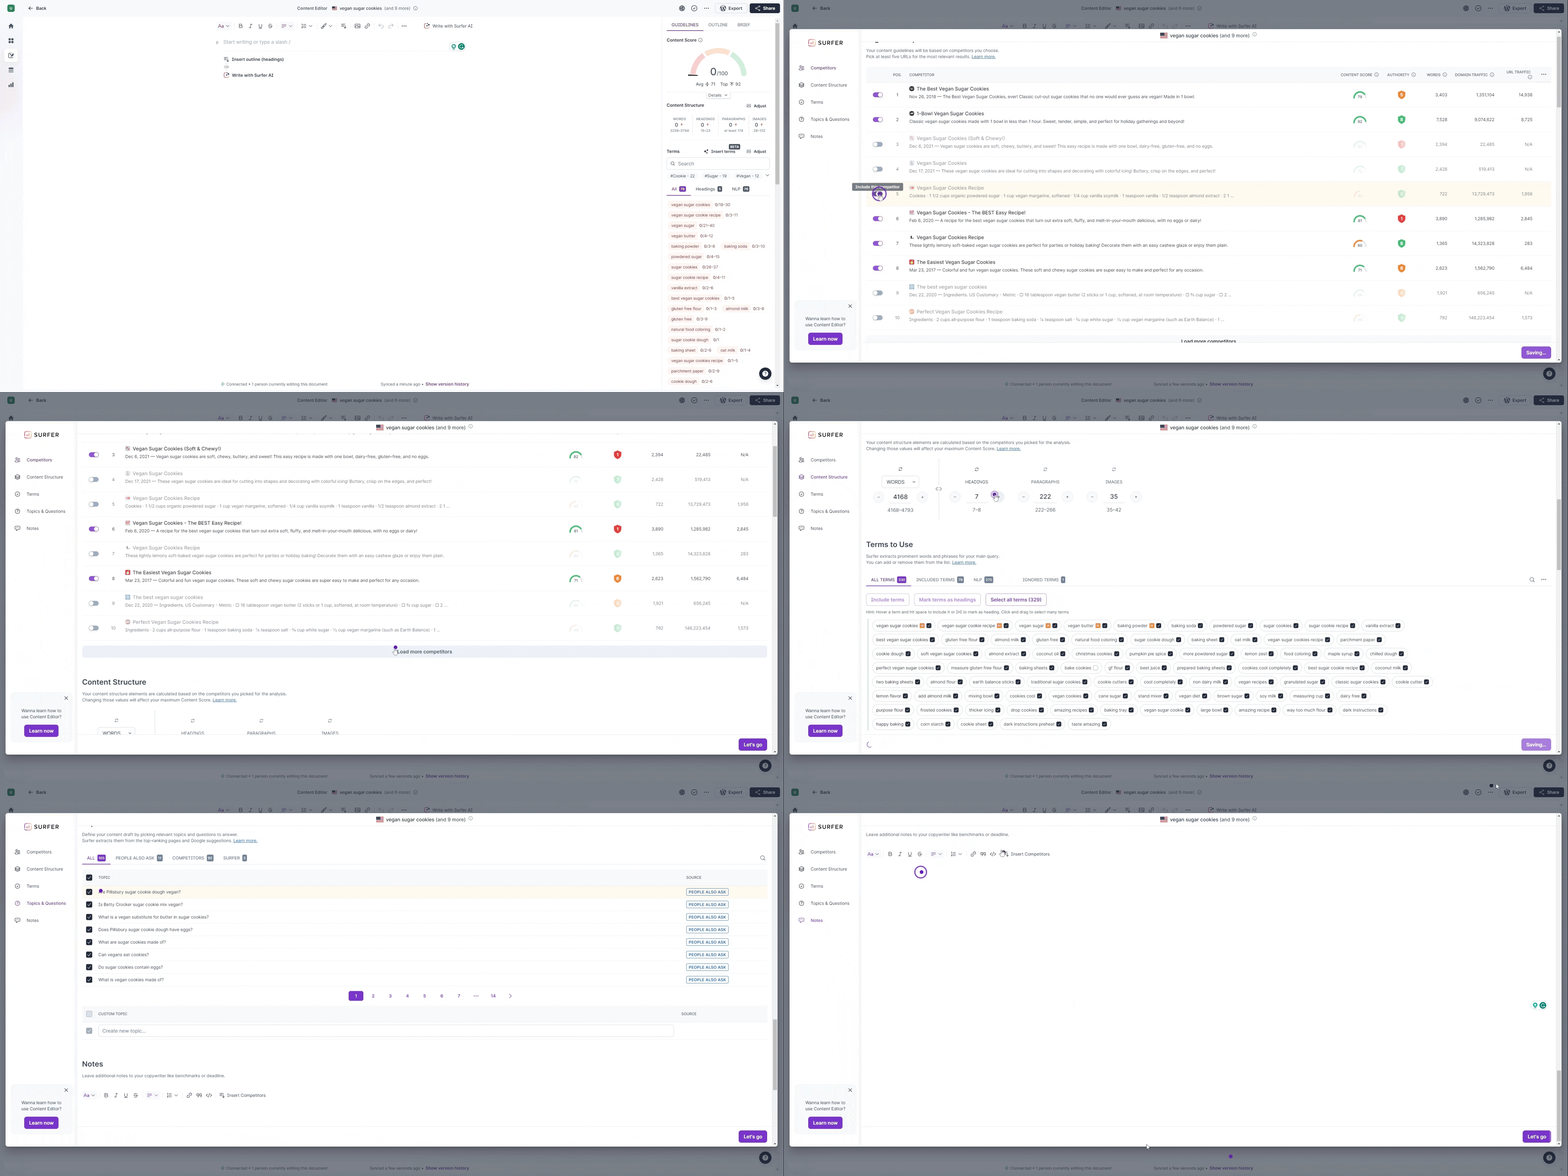
 IMPORTANT NOTE: Any changes made may affect the maximal Content Score that you can achieve. If you find the default setup not optimal for your content, you should not worry about maximizing the Content Score and introducing changes.
 Learn more about Customization Panel
The complete guidelines will be shown on your right panel, together with our Outline Builder. To successfully finalize your writing, hit the optimal terms usage and a number of structural elements, like paragraphs, headings, words, and images. These will be shown in the following:
Content structure - This is the final shape of your article, which is essential for providing the best user experience and is equally important for SEO, so make sure to meet the criteria of the content structure
Terms - This is a list of all significant terms to include in your writing. Switch to "headings" to learn which phrases should be included in a heading, or "NLP" to filter out the view and display only Natural Language Processing phrases. You can also filter and hide words and phrases already optimized to focus on other phrases. You can also see the suggested ranges for your terms by toggling "Count ranges" in the Adjust menu.
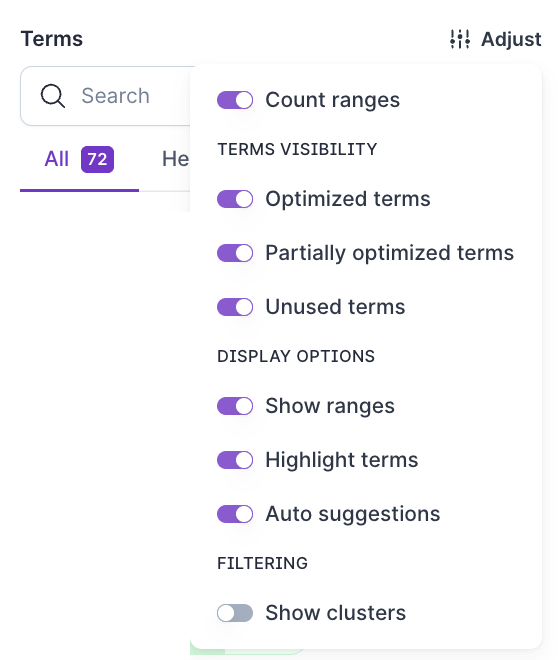
Auto suggestions - Content Editor will automatically suggest words to include as you write, reducing the need for you to look for them. If you'd like to write without the suggestions for a while, you can select the adjust toggle and turn them off.
I want to learn more about Content Editor’s features!
Do you still need help? Don't worry! You can contact us at [email protected] or via live chat by clicking the icon in the bottom-right corner.